Last time, I explained how to use you Pi to interact with a LED using Golo. Let’s see something a bit stronger.
As I told you in my first Raspberry post, I bought a bunch of HD44780U LCD.
Those little LCD can be controled in 2 modes: 4 or 8 bits.
To minimize the number of GPIO pins used, I choosed the 4 bits mode.
It uses only 6 pins to write to the LCD instead of 11 with 8 bits mode.
The only drawbacks is that you have to write the 4 most significant bits first, use a validation impulse on LCD pin 6 (enable pin), then write the 4 least significant bits.
So first, use one of the existing schema on internet to wire your LCD to the GPIO. I used one from Zem.fr

This schema is working, clear… and show a pot to define contrast!
If you read french, take some time to read the full article there, first part has a good introduction to Raspberry GPIO and this LCD.
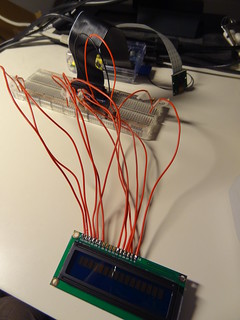
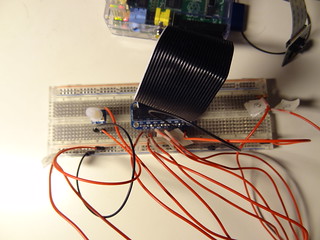
Here is my wiring:


The next step was to test this wiring and I used the python script provided once more in this article. Just be careful that you use tabs in your python code after copy/paste.
#!/usr/bin/python

import RPi.GPIO as GPIO
from time import sleep
class HD44780:

  def __init__(self, pin_rs=7, pin_e=8, pins_db=[25, 24, 23, 18]):

      self.pin_rs=pin_rs
      self.pin_e=pin_e
      self.pins_db=pins_db

      GPIO.setmode(GPIO.BCM)
      GPIO.setup(self.pin_e, GPIO.OUT)
      GPIO.setup(self.pin_rs, GPIO.OUT)
      for pin in self.pins_db:
          GPIO.setup(pin, GPIO.OUT)

      self.clear()

  def clear(self):
      """ Blank / Reset LCD """

      self.cmd(0x33) # $33 8-bit mode
      self.cmd(0x32) # $32 8-bit mode
      self.cmd(0x28) # $28 8-bit mode
      self.cmd(0x0C) # $0C 8-bit mode
      self.cmd(0x06) # $06 8-bit mode
      self.cmd(0x01) # $01 8-bit mode

  def cmd(self, bits, char_mode=False):
      """ Send command to LCD """

      sleep(0.001)
      bits=bin(bits)[2:].zfill(8)

      GPIO.output(self.pin_rs, char_mode)

      for pin in self.pins_db:
          GPIO.output(pin, False)

      for i in range(4):
          if bits[i] == "1":
              GPIO.output(self.pins_db[::-1][i], True)

      GPIO.output(self.pin_e, True)
      GPIO.output(self.pin_e, False)

      for pin in self.pins_db:
          GPIO.output(pin, False)

      for i in range(4,8):
          if bits[i] == "1":
              GPIO.output(self.pins_db[::-1][i-4], True)


      GPIO.output(self.pin_e, True)
      GPIO.output(self.pin_e, False)

  def message(self, text):
      """ Send string to LCD. Newline wraps to second line"""

      for char in text:
          if char == '\n':
              self.cmd(0xC0) # next line
          else:
              self.cmd(ord(char),True)

if __name__ == '__main__':

  lcd = HD44780()
  lcd.message(" Sure it works! ")
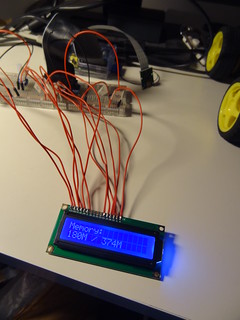
Just for your eyes, a picture from what Zem.fr script is providing.

Now we are all set!
Wait? What? Where’s PiG?
I know, I know, this is my goal here.
But let’s meditate a moment: is it better to blog once every 6 months when a project is complete or post each little experiment steps?
See you soon ;)
Comments powered by Talkyard.